Updating Projects via the Internet
Contents
You can update the visualization project on the remote device in several ways:
- Update the project with the help of a URL-scheme (from a third-party application, browser or from i2 Control V2.2)
- execute the URL command "update" in a browser or third-party application installed on the same device as i2 Control V2.2. This command can be also executed in i2 Control V2.2.
- Update the project by clicking a button with the HTTP(s) link
- create the button which starts the project upload from GoogleDisk or Amazon by HTTP(s) link and substitutes the previous project version in your visualization project.
- Update the project with the help of the QR-code reader which reads the HTTP(s) link for the update and substitutes the project
- add the interface of the QR-code reader in your visualization project (it works only on smart phones and tablets with cameras). The QR-code reader reads the project by the HTTP(s) from GoogleDisk or Amazon and substitutes the current project version.
- Update the project by sending the command from remote iRidiumTransfer
- set up connection between the network with the control panel and the developer network with running iRidium Transfer. The project on the panel is substituted by clicking the Update button.
Preparing the НТТР(s) Link to the Project
The НТТР(s) link to the project is required when using remote project update (besides the update via iRidium Transfer).
- 1. The iRidium project file has to be related to the corresponding license (Site or Device License) in iRidium Transfer:
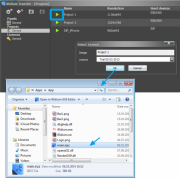
- - Click the "Create" button
- - Select the license file for the project
- - The final file: main.irpz is saved in the opened folder
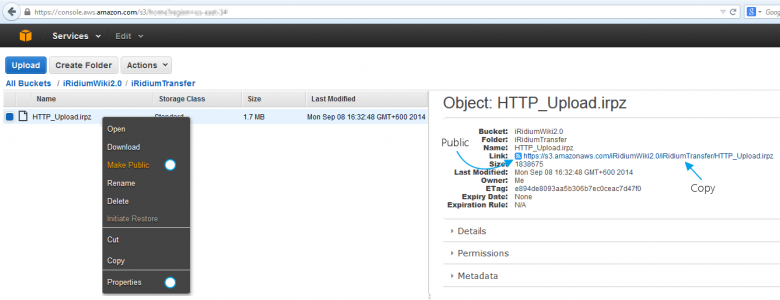
- 2. Download the received file in Google Drive or Amazon S3*:
- * at the moment use of other file hosting services is not recommended due to the specific features of redirection. But you can use any HTTP(s) server providing a direct link to the file.
- The link has to have to have the following format
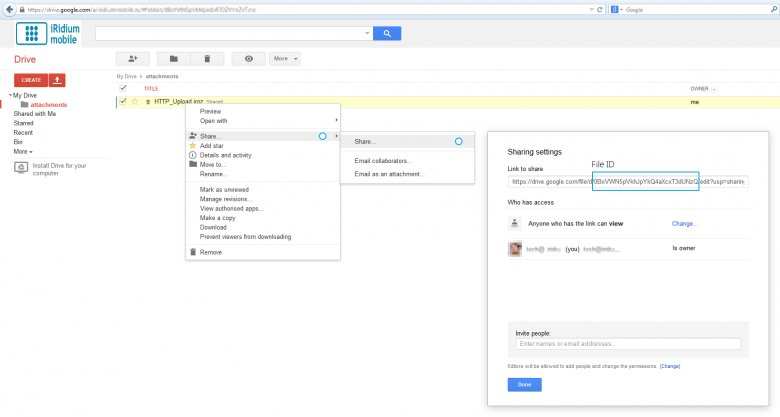
https://drive.google.com/uc?export=view&id=[FILE ID]
- [FILE ID] has to be copied from the link which is generated when setting up the public access to the file (see further).
- Activate the public access to the file in the mode “for everybody who has the link”.
- The file size of Google Drive should not exceed 20 Mb.
https://drive.google.com/uc?export=view&id=0BxVWN5pVkhJpYkQ4aXcxT3dUNzQ
To upload the new project version, use Manage Revisions in Google Drive. In this case the link to the project will be constant (see the example).
License the project:
- Device License: for each panel there has to be its own link as licenses inside the project will be different.
- Site License: it is enough to create one link to the project with the license. This project can be uploaded and used on any control panel.
- The project without the license can be uploaded on any control panel.
Update Projects with the Help of URL Schemes
- i2 Control V2.2 can be launched using the special URL scheme which can include some commands, for example the command of interface update using the link.
- The update URL scheme can be executed both from the outside (from a browser or another app) and from the inside of i2 Control V2.2.
To update the project execute the following command (on the device with i2 Control V2.2):
iridium://webupdate?https://s3.amazonaws.com/irmarketing/iPhone5_Metro.irpz
- iridium:// - the scheme of i2 Control V2.2 activation
- webupdate? - the "update project" command
- https://s3.amazonaws.com/irmarketing/iPhone5_Metro.irpz - the HTTP(s) link to the resource where the project is stored
This command can be executed in i2 Control V2.2, in a browser or another app. To execute the command in i2 Control V2.2, use the method Execute available in the macros editor and in scripts.
Activation of URL schemes for project update (when clicking the button in the macros editor)
Execute(iridium://webupdate?https://s3.amazonaws.com/irmarketing/iPhone5_Metro.irpz)
Activation of URL schemes for project update (in iRidium Script):
IR.Execute("iridium://webupdate?https://s3.amazonaws.com/irmarketing/iPhone5_Metro.irpz")
More information about using URL schemes >>>
Update Projects by Clicking the Button with the HTTP(s) Link
1. Open this script file in the script editor ![]() in GUI Editor.
Or copy it from the Project Sample
in GUI Editor.
Or copy it from the Project Sample
2. Change the string 27 in script file (you can see it below). Here you have to add your НТТР instead of the standard one:
HTTPUpdate('https://s3.amazonaws.com/iRidiumWiki2.0/iRidiumTransfer/HTTP_Upload.irpz');
It is just one string from file, you need a full JS file!
The script is activated by clicking the button in the project.
3. Select the button in the project which will start the upload.
The command Script Call (Update_by_press) is available in the macros editor after the script is added to the project:
With clicking the "Update" button the project upload from the remote resource will start. In the example during loading the Loading window is opened but it is not necessary to show it.
As soon as the project is uploaded, i2 Control will be automatically reloaded to open it.
To cancel the upload – close the i2 Control application.
Update with the Help of the QR-code Reader
This function is available in the iRidium project which is uploaded on you panel by default, when installing the application from the AppStore and GooglePlay.
The QR-code reader allows you to recognize the НТТР(s) link to the iRidium project and then to download and open the project on the control panel.
You can create a QR-code on the basis of the НТТР(s) link can be created with the help of one of free Internet resources.
- Download the project with the QR-code reader for iPad
- Download the project with the QR-code reader for iPhone
To add the QR-code reader in your project use project merging. Follow recommendations on the main page of the interface.
![]() Reading of QR-codes works only on Apple iOS and Android based devices equipped with the built-in camera. Do not add this tool in the projects for Windows and OS X (use upload by clicking the button in the project).
Reading of QR-codes works only on Apple iOS and Android based devices equipped with the built-in camera. Do not add this tool in the projects for Windows and OS X (use upload by clicking the button in the project).
Remote Update via iRidium Transfer
It is a standard way of project update. It involves project upload from your PC to the remote control panel.
1. Set up iRidium Transfer on PC
- add the control panel in the Transfer list: indicate the HWID of the remote panel. It can be done with the help of Search of the "Add Panel" button.
- select the license and project for the upload
2. Set up the router to which the PC with the running Transfer is connected
On the router set up Port Forwarding) – you need to forward ТСР port 10000 – it is a port through which Transfer sends projects on remote control panel.
You can learn your external (public) IP-address with the help of external resources, for example [1].
3. Set up i2 Control on the control panel
Indicate the public address for the application on the control panel for the project update:
- Launch i2 Control on the control panel
- Open the system settings of i2 Control. In order to do that, hold a finger or the cursor on any project area where there are no active buttons for 10 seconds.
- Password: 2007 – for accessing the settings
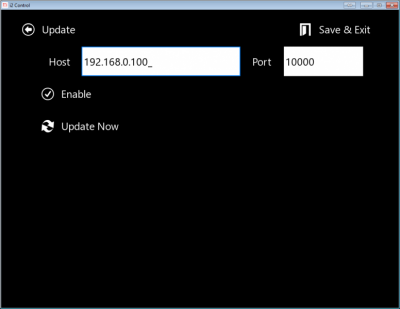
- "Update: YES" – to activate the update function
- "Host": the external IP-address of the PC with Transfer (or the domain name). What is my External IP-address?
- "Update Now: YES" > "Apply" – to start the update
- "Update: No" – deactivate the update function when the project is uploaded


