Description of iRidium for KNX
iRidium for KNX
package of tools enabling you to create an interface and software to control the KNX bus equipment by KNXNet/IP protocol. The package contains the components for installation on PC and on various control panels. A project to control the KNX bus equipment is created and customized on PC in the interface GUI Editor, and then it is uploaded to a control panel for continuous work.
Main Terms and Definitions
- iRidium Project – a project file created in iRidium GUI Editor. It consists of a graphic part (GUI) and a driver part (commands for controlling equipment). iRidium Projects set up in GUI Editor have *.IRP or *.IRPZ formats. Projects consisting of the interface and driver parts is processed by the iRidium Transfer application and uploaded on control panels with installed iRidium Apps.
- Graphic interface – the complex of items of iRidium project graphic part (project pages and popups, graphic items).
- Page /popup – objects which define the interface structure. They are meant for placing graphic items. You can open only one project page at a time. It is a project base over which you can place any number of popups of different size.
- Graphic item – an object on a project page or popup (button, level, animated item, inertial list, etc.)
- Control panel– an iOS, Windows, Android, OS X based device with the installed iRidium App where it is required to launch iRidium project.
- License (license file) – an *.irl format file which enables connection between a panel and controlled equipment. The license is uploaded onto the panel together with the iRidium project.
- Activation key – a set of 160 symbols which serves as an iRidium license activation code. It contains information about the acquired license and enables you to generate a license file.
- Licensing#Activation of iRidium Licenses|Process of key activation]] – creation of a license file with the help of the key in the MY LICENSES section of the web site.
- Control panel identifier (HWID/UDID) – the unique identifier of the Apple iOS (UDID) or Windows (HWID) controlled device, which is required for iRidium key activation and license file receipt.
- Emulator – a tool for simulation of the project launch on the control panel. It enables you to see how the project works and check communication with the equipment.
- Driver – a description of a protocol for equipment operation created in iRidium. It allows iRidium projects to refer to the equipment of the corresponding type and receive data from it. iRidium supports a number of native (written preliminarily and stored in iRidium Apps) drivers. There is also a possibility to create custom drivers on the basis of AV & Custom Systems with the help of IRidium DDK – it enables profound configuration of the driver with the help of the script system.
- IRidium DDK – a tool for creating drivers. It includes iRidium Script machine, iRidium Script API, iRidium DDK for writing drivers and examples of drivers.
- Controlled device – equipment (a controller, transmitter, media server, AV device, etc.) which uses one of the drivers described either in native or script part of iRidium project.
- Command – an instruction for sending data to controlled equipment. The command sending is activated by pressing on a graphic item, system events or scripts. It contains information about the data type and settings specific for particular equipment. The list of instructions (commands) is stored in the Project Device Panel tree.
- Status channels (Feedback) – an instruction for processing data received from the controlled equipment. Received data can affect GUI items (value output on the screen, switching item states). Status channels are stored in the Project Device Panel tree.
- [[Project Token – a variable for saving data received from control equipment or interface. Project Tokens serve for writing, storing data or transferring them inside the project. The data can be numerical (in the DEC format) or string (in the ASCII format). After the restart of iRidium Apps or control panels information written in Project tokens stays available (for example you can write a login and password for getting access to the equipment, connection properties – IP-address, device password, etc).
- System Tokens – variables storing data about the control panel state (time, date, data from sensors, etc.). System tokens cannot be affected via interfaces, they can be read only.
- Driver Tokens – variables storing data about the state of connection to project drivers and connection properties. Driver tokens cannot be affected via interfaces, they can be read only.
Contents
How iRidium Expands KNX Capabilities
There are two ways to use iRidium:
1. First way – use of standard tools of iRidium visualization and control.
It consists of creation of a graphic interface and setting up of communication with KNX addresses. In this case you use all KNX control capabilities and iRidium visualization features – graphic effects, work with lists, work with the control panel sensors, multiplatformity and site licensing.
2. Second way extends the capabilities of the first way due to iRidium Script (iRidium Script API and DDK).
These tools enable you to substantially extend the graphics capabilities and to customize the control of any other equipment, like XBMC, Sonos, TV in the KNX project.
This manual describes only the first way of iRidium use.
How It Works

|
Development create an interface and set up drivers in iRidium GUI Editor |

|
Licensing buy a license for the required product or try for free |

|
Upload upload your project on iOS/Windows/Android/OS X with the help of iRidium Transfer |
Install the iRidium Software Package on PC
Creation of a project in iRidium starts with installing the part of the software package for PC with Windows OS. This part of the software package is responsible for creation of iRidium projects - setting up graphic interfaces, communication with equipment and uploading projects on control panels.
Where to Download From
You can download iRidium Environment to your PC (on Windows XP/7) from the web site iridiummobile.net, the "Download" section.
iRidium Components for Installation on PC
For working with iRidium you need the following components of the software package installed on your PC:
| iRidium GUI Editor |
|---|
| the application for creating control interfaces for automation systems, configuring drivers and equipment used in automation projects and writing custom drivers with the help of IRidium DDK. It is responsible for setting up connection between graphic and driver parts of iRidium projects (iRidium Project). |
| iRidium Project |
|---|
| a project file created in iRidium GUI Editor. It consists of a graphic part (interface) and a driver part (commands for controlling equipment). iRidium projects set up in GUI Editor have the *.IRP or *.IRPZ formats. Projects consisting of the interface and driver parts are processed by the iRidium Transfer application and uploaded on control panels with installed iRidium Apps. |
| iRidium Transfer |
|---|
| the application for uploading iRidium projects and licenses on control panels. |
| iRidium App |
|---|
| a set of user applications on the AppStore, GooglePlay and application for Windows and OS X. The Apps are installed on iOS/Windows/Android/OS X control panels. They enable upload, launch and similar work of iRidium projects on all supported operating systems. |
Requirements to PC for Working with iRidium
- Microsoft Windows XP/7/8 OS
- Not less than 2 Gb RAM
- Not less than 1 Gb of free space on HDD
- 3D-video adapter with memory not less than 512 Mb
Important! It is required to start iRidium components on PC under Administrator account or using Administrator rights for correct work.
Important! The correct work of iRidium components is not guaranteed when working on Windows OS Emulator (for example, WineHQ). iRidium licenses might not work due to changing of virtual machine HWID .
Important! When hard disks of your PC work in the RAID array, every time it generates new HWID. Do not activate licenses for your PC with the RAID array, this mode should be turned off.
Important! If video card drivers do not support OpenGL (for Windows XP) and DirectX 10 (for Windows 7/8) there might be errors when displaying graphics. Update your video card drivers if the graphics is displayed incorrectly.
Install iRidium App on Control Panel
iRidium Apps are the iRidium components required for working with the KNX driver. iRidium Apps for KNX can be downloaded from the specialized online application stores (AppStore, MacStore, GooglePlay). The choice of the store depends on the type of the control panel where you want to use iRidium.
At the moment iRidium Apps work on the following types of control panels:
- Apple iOS based devices - V6 and later: iPad (later than the 1st), iPhone (3Gs and later), iPod touch (4 generation and later)
- Windows 7/8 based devices: PCs, monoblocks, tablet computers
- Android OS based devices – V2.3 and later: smartphones and tablet computers (your device should have a GPS module and an SD-card)
- OS X based devices: OS X 10.5 Leopard and later (Mac Mini, iMac, MacPro, MacBook)
Where to Download From
Install the i2 Control application on your control panel with one of the following OS:
How to Work with iRidium App
iRidium App which is responsible for upload and launch of iRidium projects is used for your project to work on control panels. The upload on your control panel can be performed from the iRidium Transfer application or directly from iRidium GUI Editor with the help of Transfer.
The "i2 Control" application is installed on your panel. It connects to the iRidium Transfer application running on your PC at launch. The "i2 Control" application uploads iRidium projects and iRidium licenses which enable connection to the KNX bus equipment from the Transfer application.
Properties of iRidium project launch and work can be changed in the internal settings of the "i2 Control" application.
Create Projects
iRidium GUI Editor is used for creation of iRidium projects consisting of the graphic and driver parts. It has several working areas aimed to form different project components:
Workspace of iRidium GUI Editor
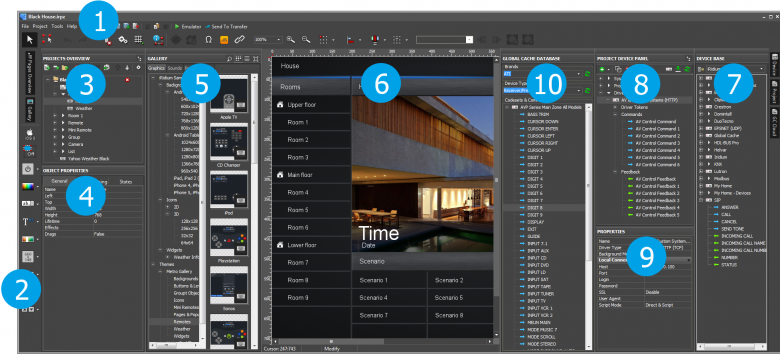
After starting iRidium GUI Editor you can see the workspace which consists of several zones:
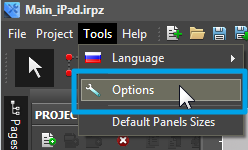
- Tool Box: contains main Editor tools and shifts to settings.
- Box of drawing tools: contains tools for fast drawing of graphic items. After selecting a style and indicting the scaling possibility, you can add buttons, levels and other objects in projects fast and easy.
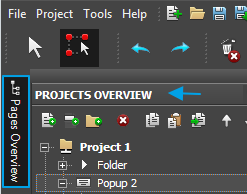
- Project Overview: displays the structure of the project graphic part, enabling you to add new items to it (pages, popups, folders).
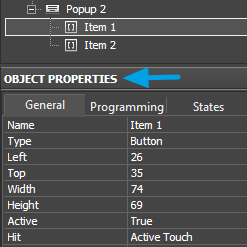
- Object Properties: the part of the Project Overview panel. It contains information about the selected GUI object – a page, popup or graphic item.
- Gallery: the gallery of images and sounds which can be used when creating an interface.
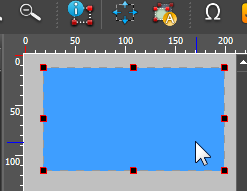
- Workspace: displays appearance of pages and popups selected in Project Overview. Here graphic items for project pages and popups are placed. The commands to items are also assigned here.
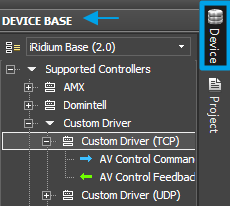
- Device Base: the database of built-in iRidium drivers (products). It includes tools for creating drivers for users and additional databases of script drivers.
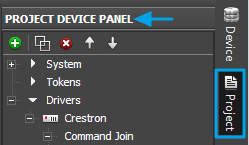
- Project Device Panel: displays the drivers used in the project and all their commands and channels. The commands can be dragged into the editor workspace (on items).
- Properties: the part of the Project Device Panel. The properties of the selected driver, command or channel are set up here.
- Global Caché Cloud: the database of IR commands for using with Global Caché converters.
Creation of New Projects in iRidium GUI Editor
Creation of a project in iRidium GUI Editor starts with setting up its main properties such as resolution (in pixels), orientation (Portrait or Landscape), necessity of showing a standard status bar of the control device:
After the new project is created you can start work with the zones of the Editor working area:
Editor Settings
Display of information about graphic items and properties of the launched project are set in the tabs of main Editor settings.
Creation of Graphic Interfaces
You can use a number of specific visualization capabilities for creating unique and user-friendly graphic interfaces in iRidium GUI Editor:
- Animated items
- Edit box
- Virtual keyboards
- Inertial lists
- Ready graphic and sound galleries
- Chameleon images
- Visualization effects of pressings
- Effects for page switching
- Passwords on actions
- Video from IP cameras
- Graphic informers
- Hyperlinks, OS commands
- Unicode support
- Emulation of projects work
- Scripts support
You can find more information about iRidium visualization capabilities in the iRidium GUI Editor section.
Setting up Communication with Equipment
You can find information about setting up communication with the KNX bus, examples of control KNX equipment in the following sections of the instructions for operation with iRidium for KNX.
- Go to: Basic Operation of iRidium with the KNX Bus Equipment
- Go to: Examples of Controlling Equipment of the KNX Bus
Receive Licenses
| iRidium License |
|---|
| an *.irl format file which enables connection between a panel and controlled equipment. Graphic interfaces can work without the license but there is no communication with equipment.
1. The number of control panels you want to control your equipment from
Launch Projects on Control PanelsUploading and launching of iRidium projects on control panels are performed with the help of the iRidium Transfer application installed on your PC. You can also upload your project on the panel from GUI Editor with the help of Transfer.
|
